Learn How To Setup Selenium For Eclipse with Java

Introduction
Setting up Selenium in Eclipse can streamline your web testing process, making it more efficient and effective. If you’re eager to automate your web application tests using Selenium, this guide will walk you through a straightforward setup process. By the end, you’ll have Selenium configured in Eclipse for Java, ready to start writing and executing tests with ease. Whether you’re new to Selenium or looking to refine your setup, this tutorial will provide the clear, step-by-step instructions you need to get up and running quickly.
What is Selenium WebDriver
Selenium WebDriver is a powerful, open-source tool designed to automate web browsers. As a key part of the Selenium suite, it offers a programming interface that enables developers and testers to interact with browsers effortlessly. Selenium WebDriver supports multiple programming languages, including Java, Python, Ruby, and C#, allowing users to write tests that simulate user interactions, navigate web pages, and conduct functional testing of web applications. Its capability to automate browser actions makes it an indispensable tool for maintaining the quality and reliability of web applications.
Selenium WebDriver Advantages
Here are the advantages that make Selenium WebDriver a popular choice for web application testing:
-
Supports Multiple Browsers:
Compatible with major browsers like Chrome, Firefox, Safari, and Edge.
-
Cross-Platform Compatibility:
Works on various operating systems including Windows, macOS, and Linux.
-
Language Flexibility:
Allows test scripts to be written in multiple programming languages such as Java, Python, C#, and Ruby.
-
Rich Set of Features:
Provides advanced capabilities for handling various web elements and interactions, including JavaScript alerts, file uploads, and more.
-
Parallel Test Execution:
Supports running tests in parallel, which speeds up the testing process.
-
Integration Capabilities:
Easily integrates with popular testing frameworks and tools like TestNG, JUnit, and CI/CD systems such as Jenkins.
-
User Interaction Simulation:
Accurately simulates user interactions with web elements, including clicks, form submissions, and navigations.
-
Robust and Flexible:
Offers a high level of flexibility in test script design and can handle dynamic web elements.
-
Open Source:
Free to use and backed by a strong community of contributors and users.
-
Extensive Documentation:
Well-documented with a large number of resources, tutorials, and community support.
Installation Steps
Step 1: Install Java SE Development Kit (JDK) and Setup
Java enables the creation, execution, and management of Selenium WebDriver tests effectively. It is essential for running Selenium WebDriver scripts because:
-
Language Support: It is one of the primary languages for writing Selenium tests.
-
API Integration:
Provides a Java API for interacting with browsers.
-
Framework Compatibility:
Works with test frameworks like TestNG and JUnit.
-
Cross-Platform:
Java’s portability allows tests to run on any JVM-supported platform.
-
Build Tool Integration:
Compatible with tools like Maven and Gradle for managing and executing tests.
-
Community and Resources:
Offers extensive support and resources through its large ecosystem.
JDK Installation
Download and install the JDK version based on your system requirements from here. Click on the Download link to download the JDK .exe file.
-
Example:
If you want to install it on Windows, you can download the Windows x64 Installer JDK from the list as per the screen capture below:
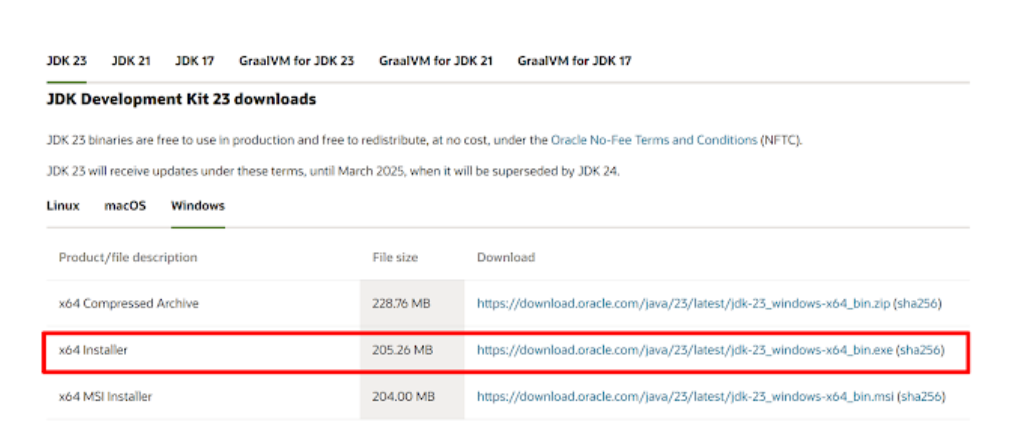
Once the download is complete, double-click the installer file called jdk-22_windows-x64_bin.exe to begin the installation process. The following screen will be displayed.
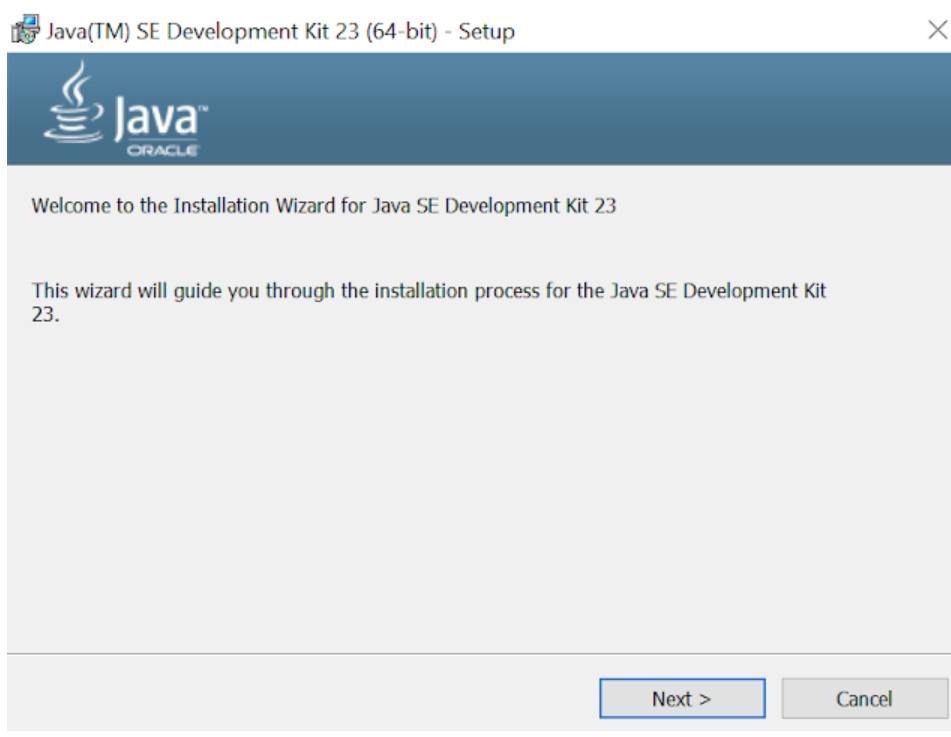
Click on the Next button. This will display the following screen, where you will select the path to store the JDK files.
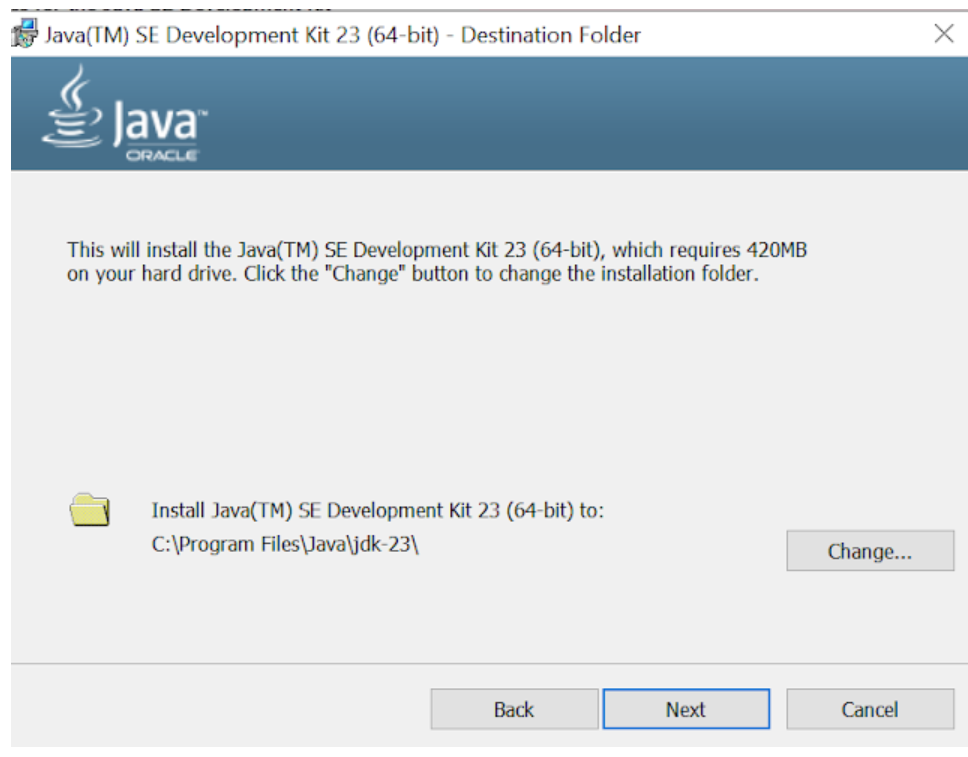
Select the default path indicated or click the Change… button to select your desired file path. Now select the Next button. The Progress screen will be displayed, as per the screen capture below.
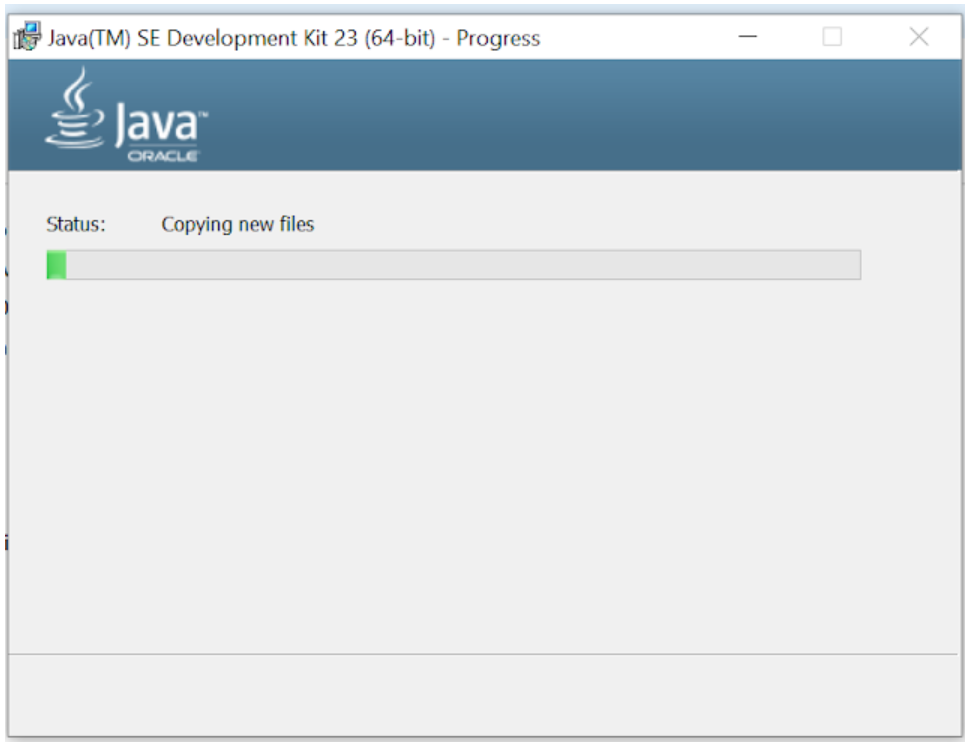
After the component registration has been updated, the following screen will be displayed, indicating that the Java SE Development Kit has been successfully Installed.
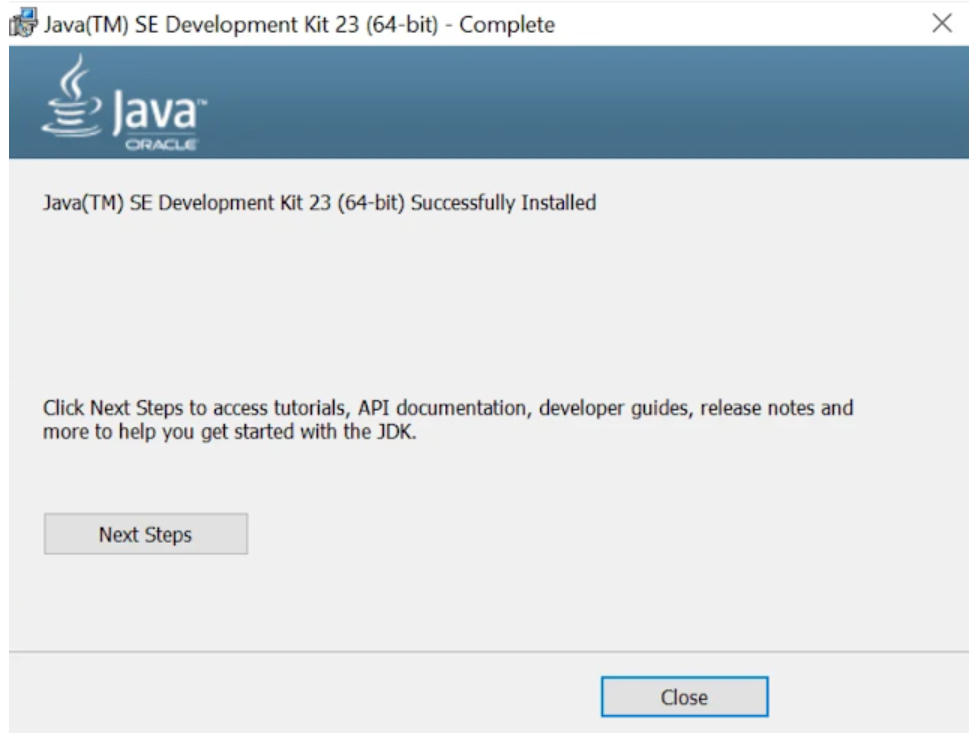
Click the Close button.
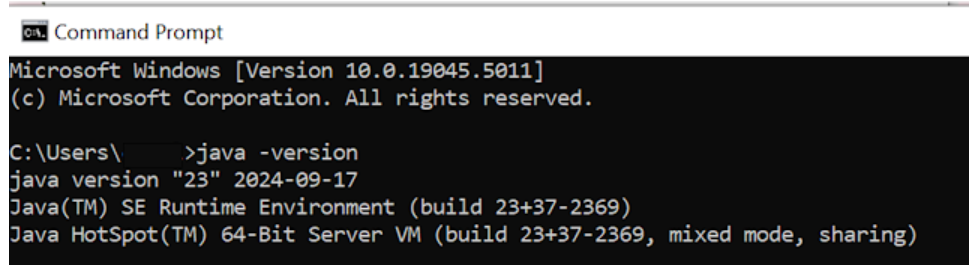
Now that the JDK installation is complete, verify the installation by opening a command prompt and typing java -version at the prompt, as shown in the screen capture below.
You will know that the JDK installation was successful if the current version of the JDK you are installing (in my case, version 22.0.1) is displayed, as per the screen capture below.
Note:
This JDK version comes bundled with Java Runtime Environment (JRE), so you don’t have to download and install the JRE separately.
Set Up the Environmental Variables for JDK in Microsoft Windows
After installing the JDK, you must set environment variables to ensure the Selenium scripts can locate your Java libraries.
Set the JAVA_HOME and PATH environment variables in Microsoft Windows:
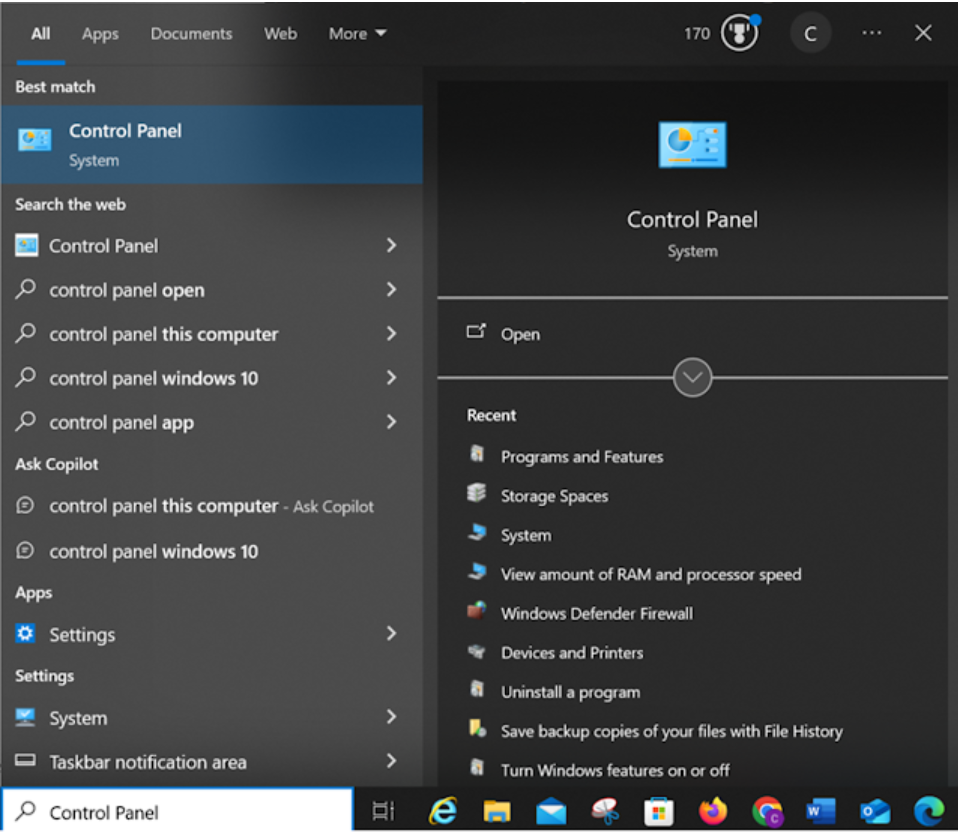
Type Control Panel in the Windows search box, then select the Control Panel icon. See the screen capture below.
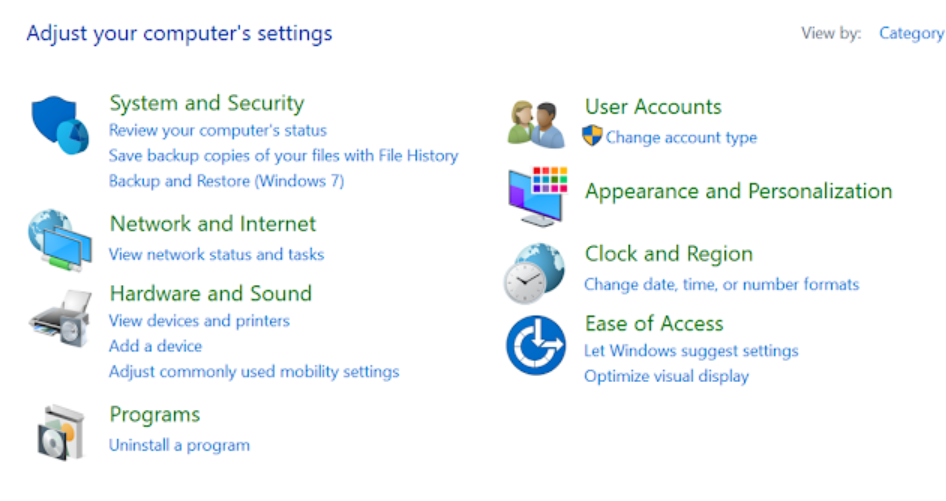
Select System and Security from the Control Panel items list
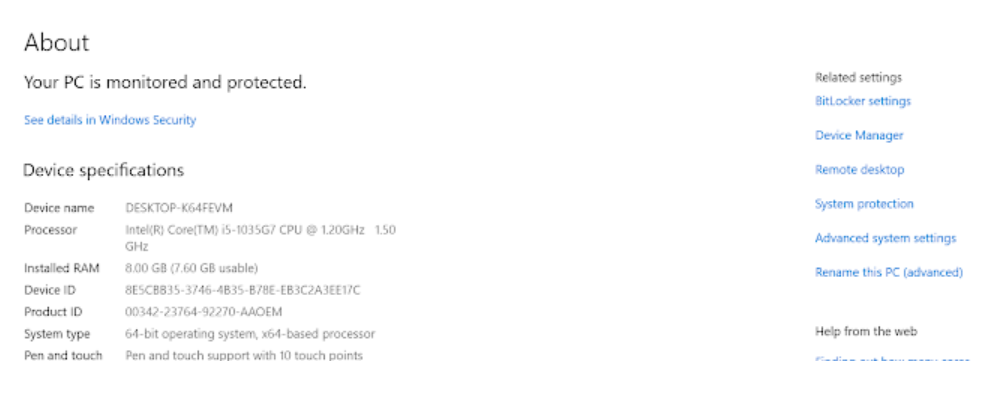
Select System on the System and Security window, below.

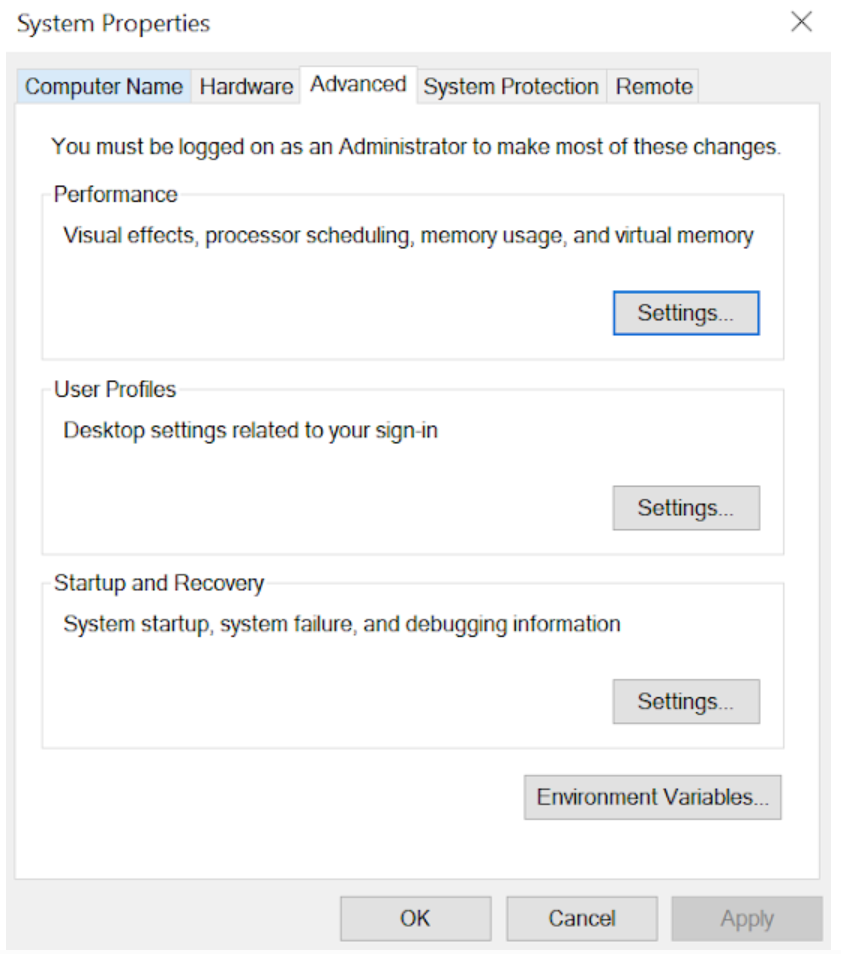
Select Advanced System Settings on the Settings window, below.
On the System Properties window, select the Environment Variables button
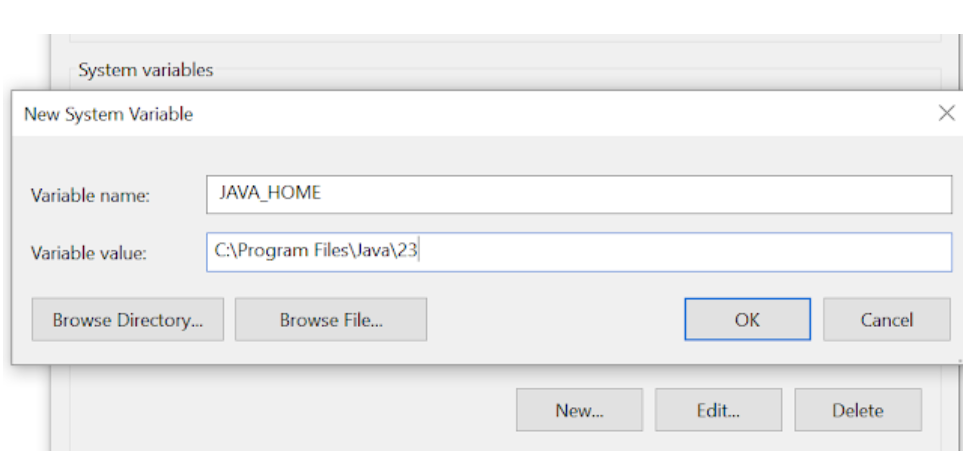
On the Environment Variables window, add the JAVA_HOME environment variable as follows (see screen capture below):
- Click New in the System Variables section.
- Enter JAVA_HOME in the Variable name field.
- In the Variable value field, enter the location where the JDK software is installed (for example, C:\Program Files\Java<jdk_version>). If the JAVA_HOME variable already exists, click Edit and replace the old variable value with C:\Program Files\Java<jdk_version>).
- Click the OK button.
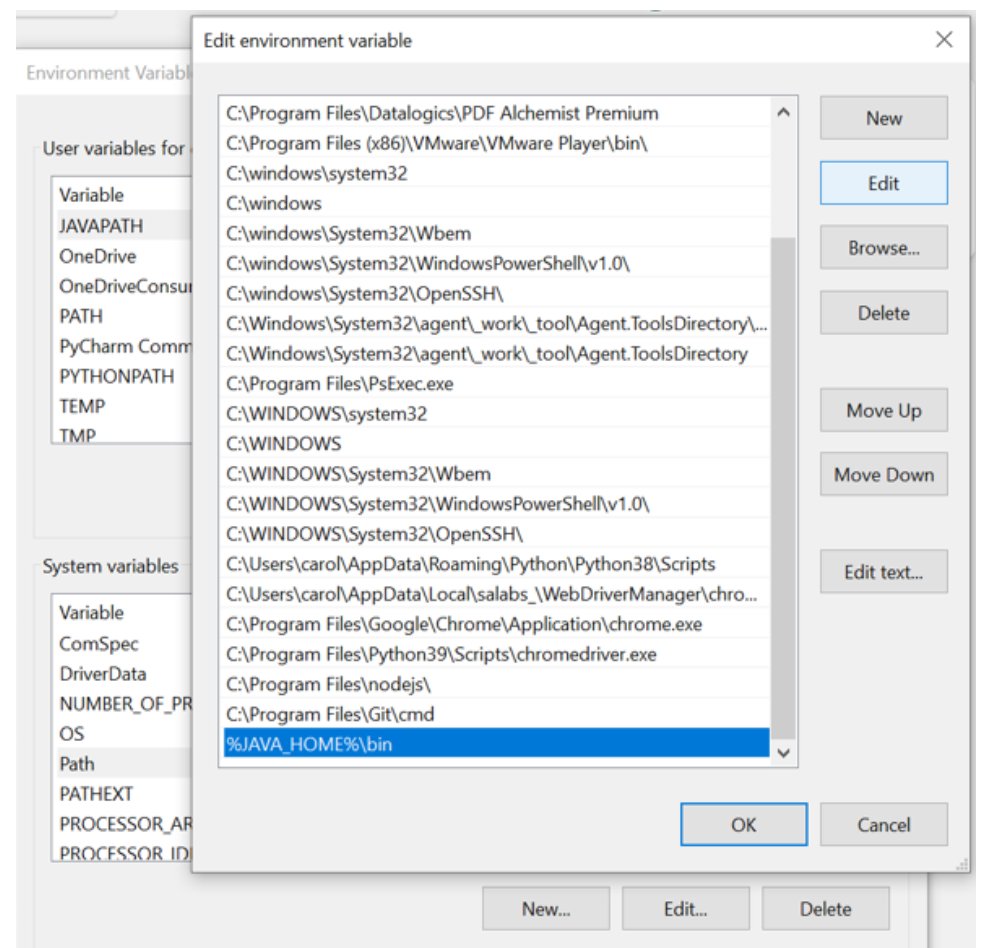
Create or update the PATH environment variable to include the location of the Java executable files:
- In the System Variables section, select the PATH variable, and click Edit if the PATH variable exists or click New if the PATH variable does not exist. It would be rare for the PATH not to already exist.
- In the Variable value field, insert %JAVA_HOME%\bin. If there are existing directories, add %JAVA_HOME%\bin at the end of all the existing directories. Do not delete any existing entries; otherwise, some existing applications may no longer run.
- Click OK.
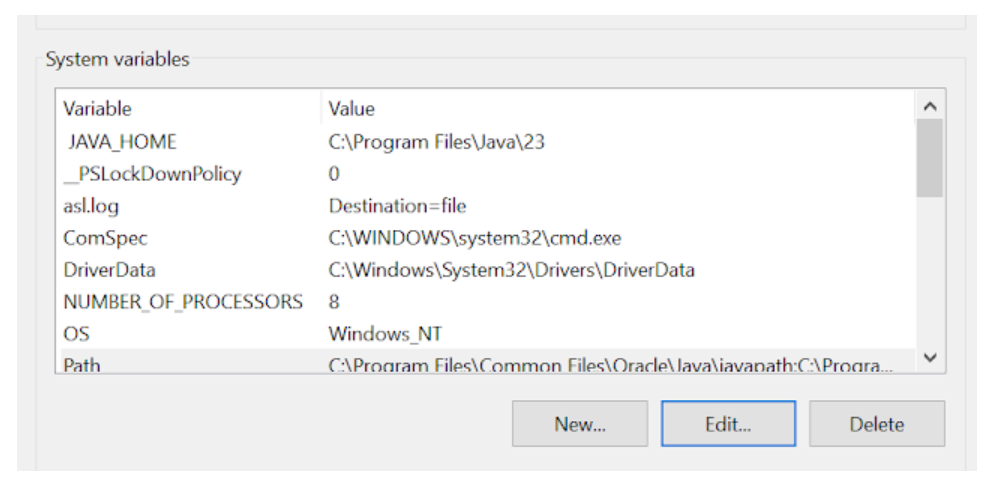
The JAVA_HOME system variable should look like this:
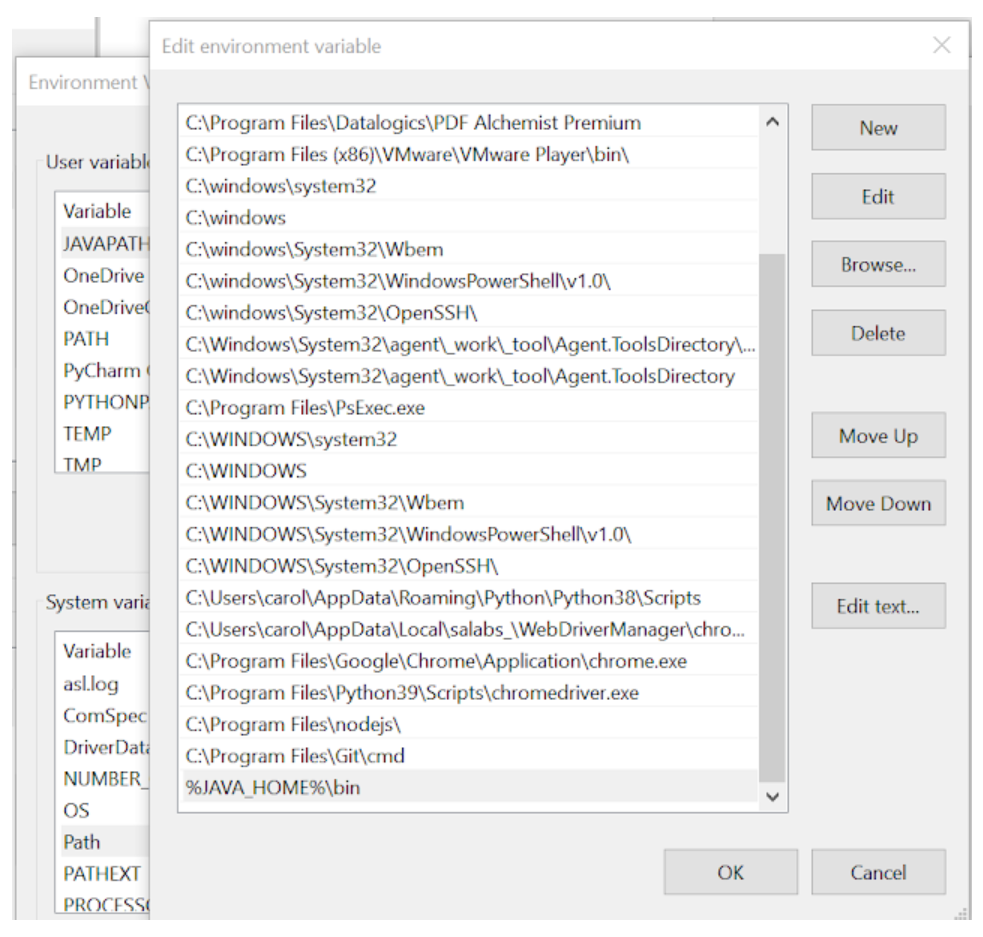
Click on the PATH variable under the System variables section in the Edit Environment variables window. You should see %JAVA_HOME%\bin on the Edit environment variable window, as per the screen capture below.
Exit the Control Panel.
Step 2: Install Eclipse IDE
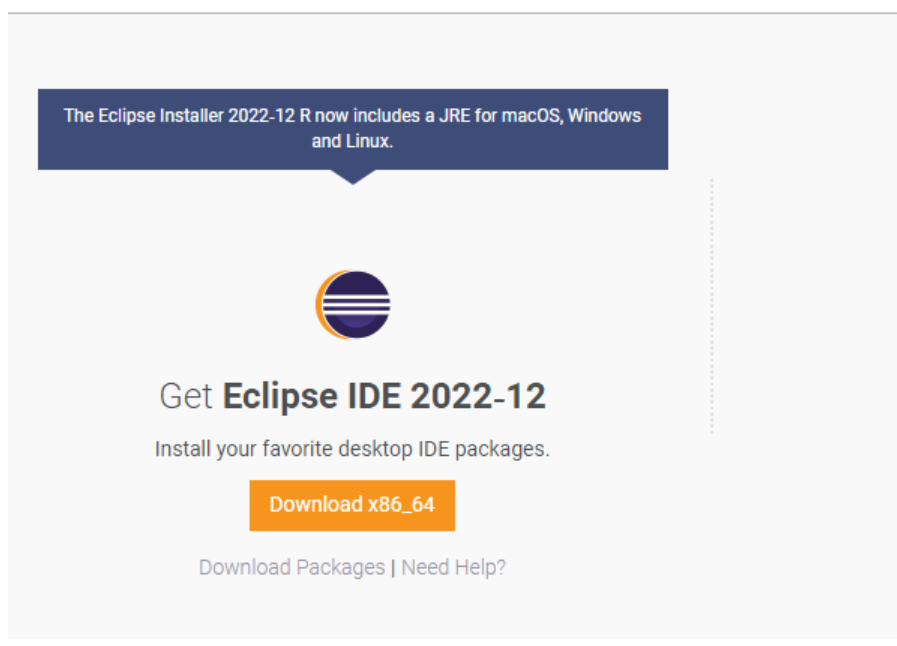
Download the latest version of Eclipse IDE for Java Developers here. Be sure to choose correctly between Windows 32 Bit and 64 Bit versions for your machine.
Install Eclipse IDE
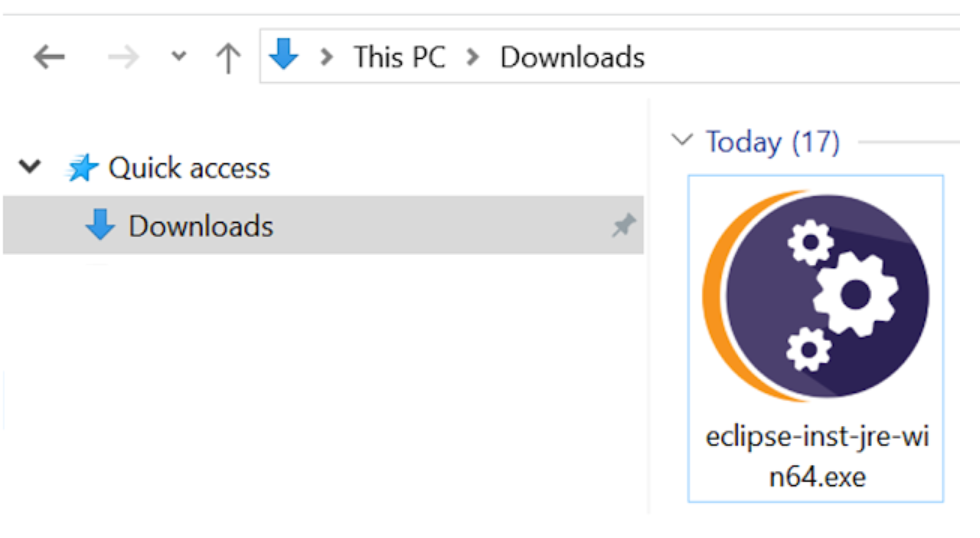
The .exe file, named eclipse-inst-jre-win64.exe, will be downloaded.
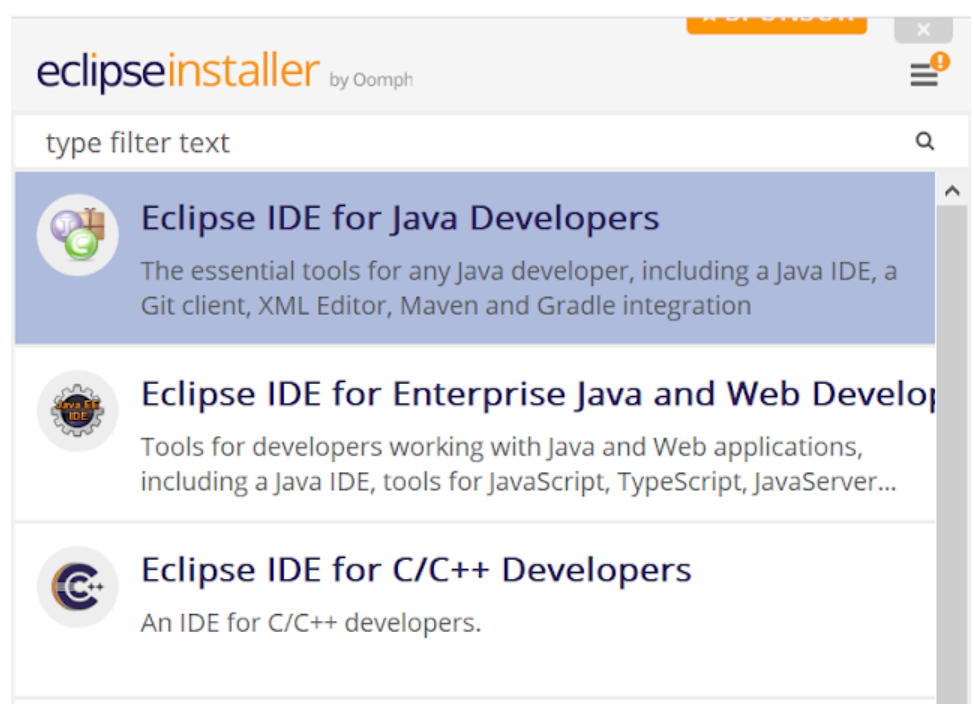
Double-click on the eclipse-inst-jre-win64.exe file to install Eclipse. A new window will open. Select Eclipse IDE for Java Developers.
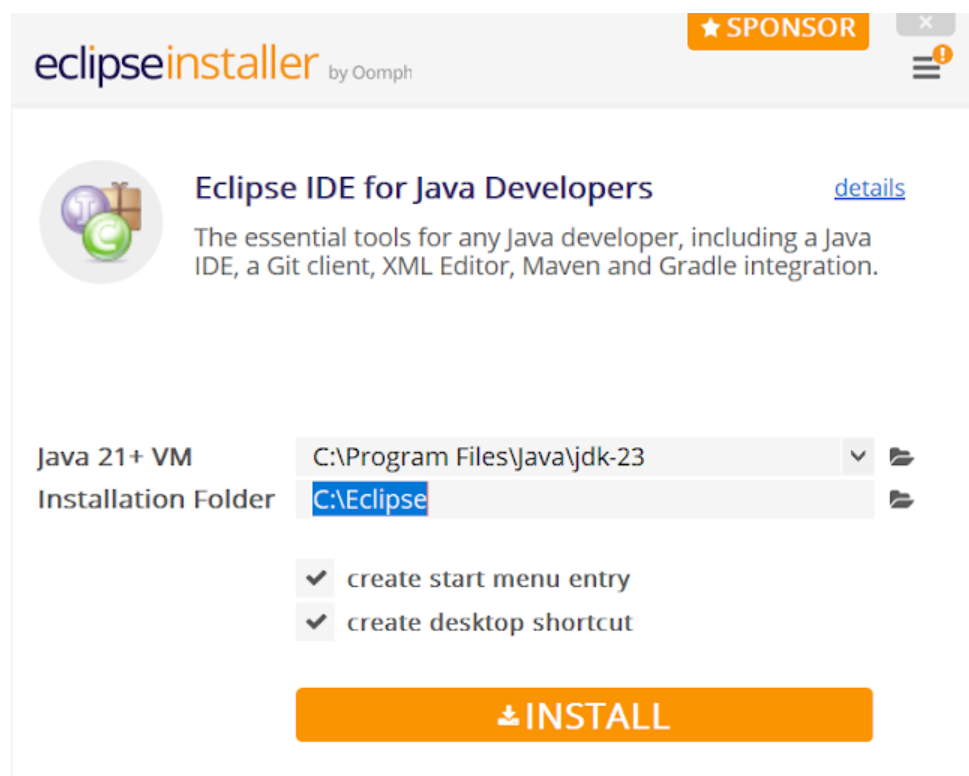
Another window will open, per the screen capture below. Click the INSTALL button.
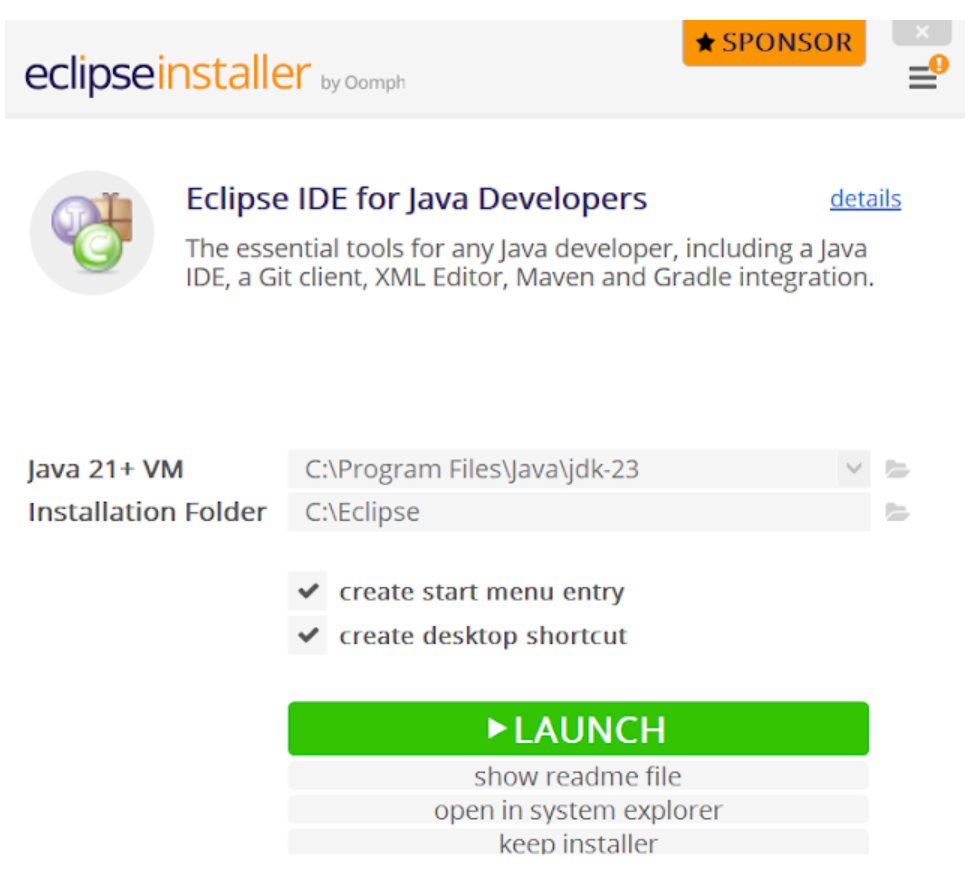
After the installation is completed, click Launch on the window that appears. This will start the Eclipse IDE.
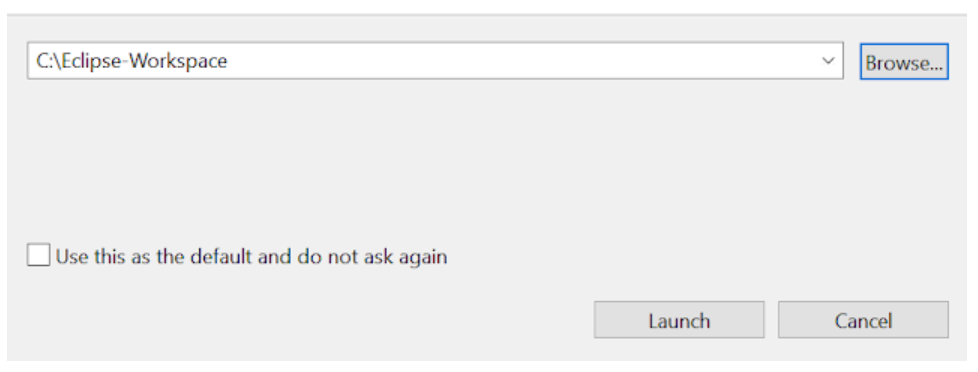
The Select a directory as workspace window will open. Keep the default location and select Launch.
The Welcome to the Eclipse IDE for Java Developers window will open.
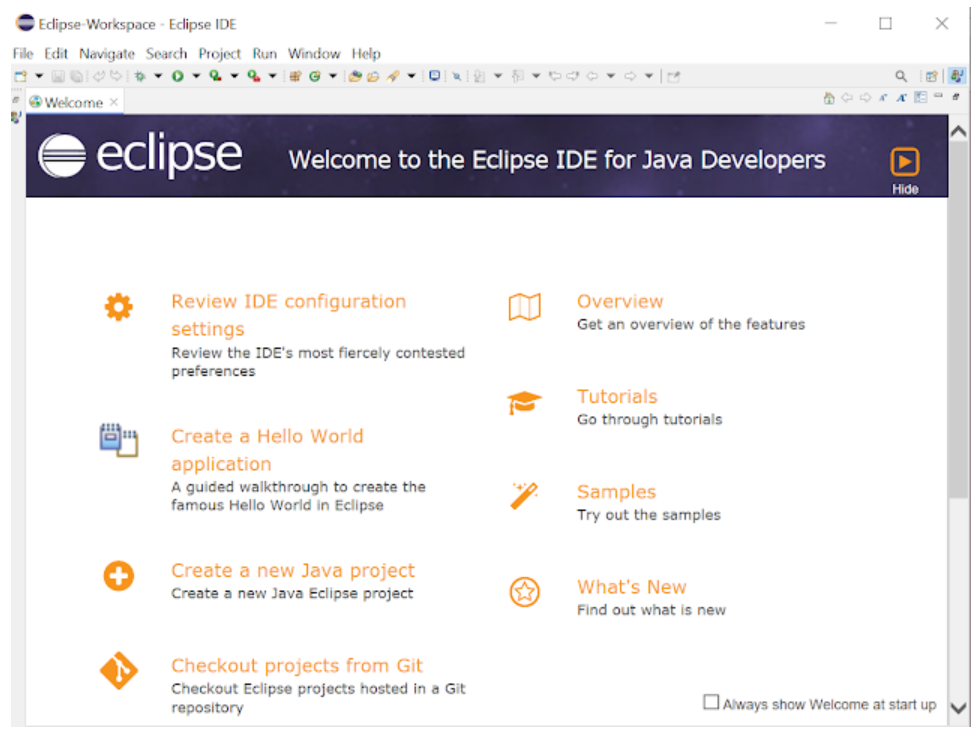
Now, close the Welcome to the Eclipse IDE for Java Developers. You must install Selenium and configure Eclipse for Java projects before you can create your first Selenium Java project in Eclipse.
Step 3: Install Selenium WebDriver
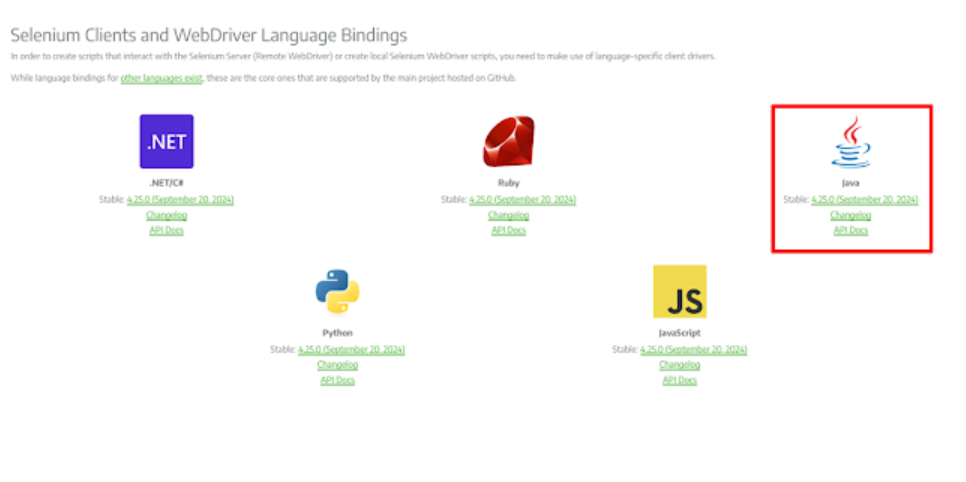
To install Selenium WebDriver for Java on your system, download the latest version of the Selenium WebDriver for Java zip file from here.
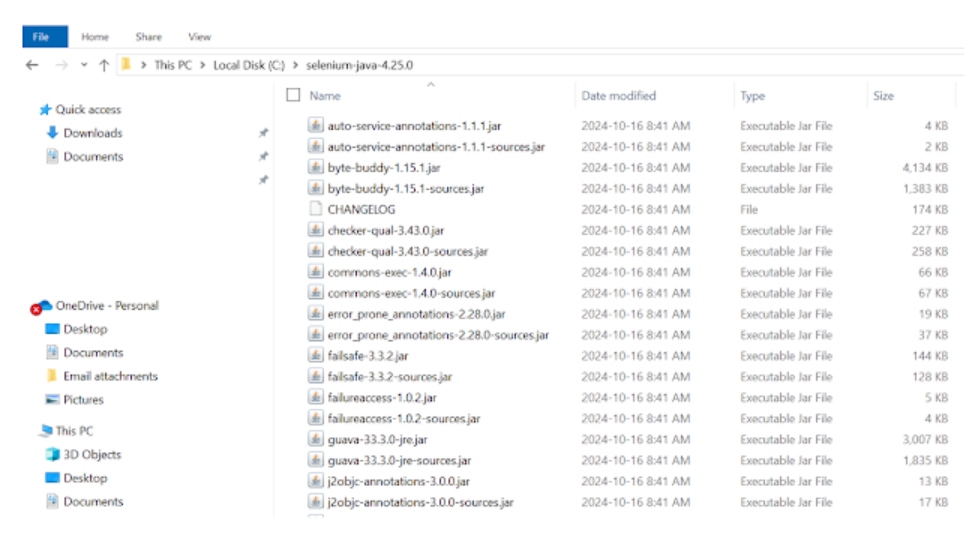
Extract the ZIP file to the desired folder on the c: drive. The contents should look like the screen capture below:
To prevent a slf4j error, download and add the following 2 jar files to your selenium-java-
Download slf4j-simple/2.0.7 at the following link.
Download logback-classic-1.2.9.jar at the following link.
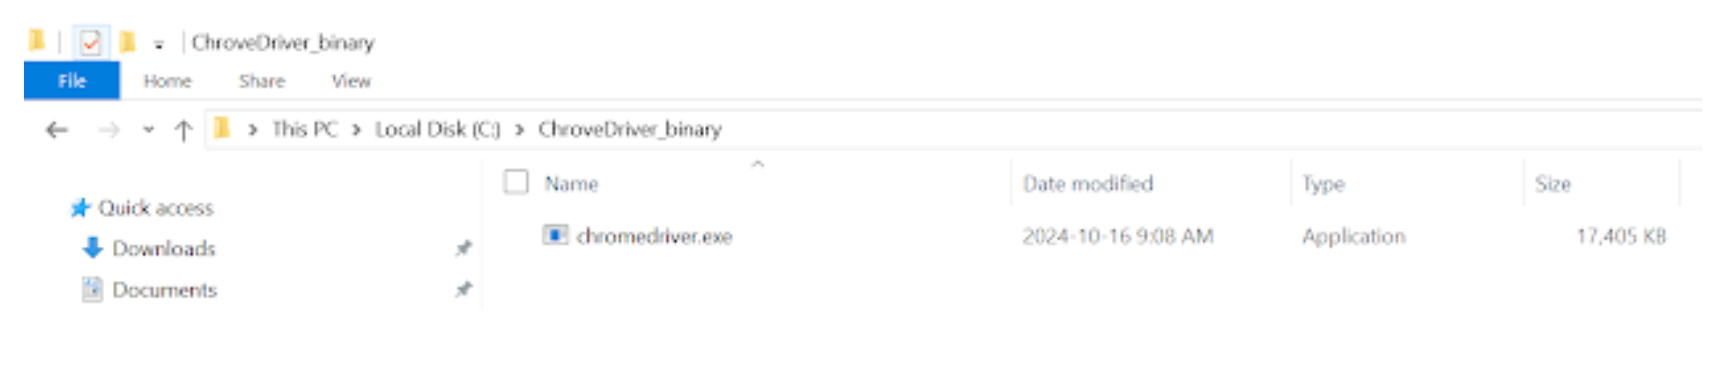
Step 4: Install ChromeDriver
ChromeDriver is essential for executing Selenium test scripts, as it enables automation of the Chrome browser. It allows your tests to simulate user interactions with the browser, such as clicking buttons, filling out forms, and navigating between pages, just as a real user would.
To automate tests with Selenium on Chrome, you need to set up ChromeDriver. Here’s how you can get started:
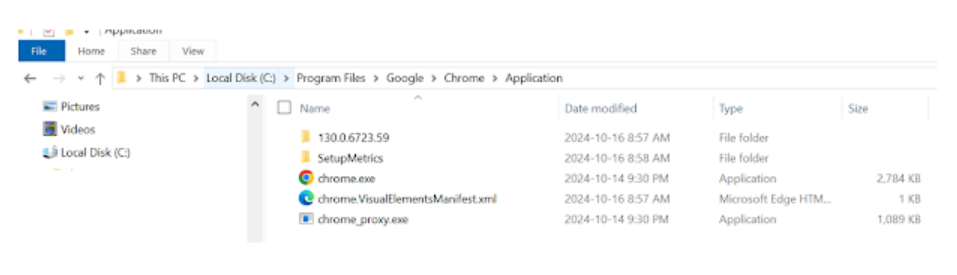
- Install Chrome: Ensure that Chromium or Google Chrome is installed in a recognized location on your system.
- Download ChromeDriver: Download the ChromeDriver binary that corresponds to your operating system and matches the version of Google Chrome you have installed. You can find the appropriate version under the downloads section on the ChromeDriver site.
Configure the PATH Environment Variable:
- Add to PATH: Include the full path to the ChromeDriver executable in the system environment variable PATH to make it accessible.
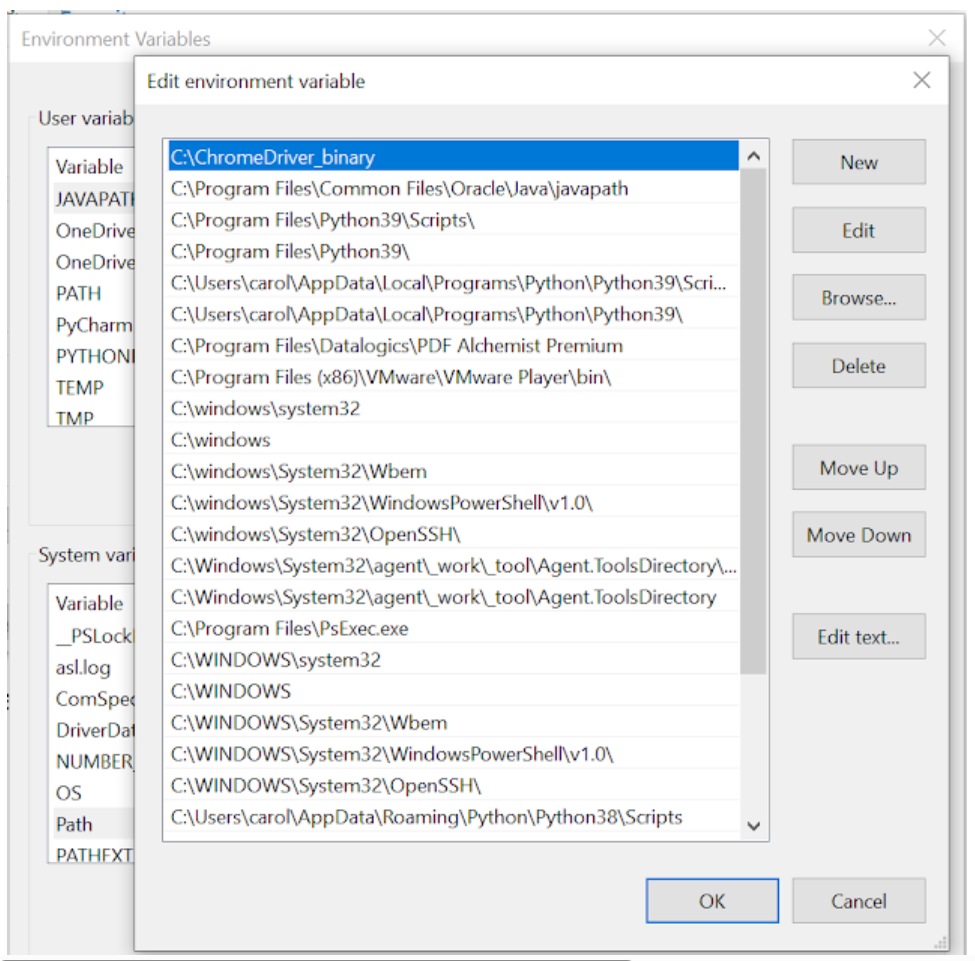
- Java Configuration: For Java projects, specify the path to ChromeDriver using the webdriver.chrome.driver system property in your Selenium script. Here’s an example:

By following these steps, you can ensure that your Selenium tests are properly set up to run with ChromeDriver, allowing for effective web automation and testing.
Below are the links to the more popular Selenium-supported browsers that will have their own drivers available.
- Chrome: https://chromedriver.chromium.org/downloads
- Edge: https://developer.microsoft.com/en-us/microsoft-edge/tools/webdriver/
- Firefox: https://github.com/mozilla/geckodriver/releases
- Safari: https://webkit.org/blog/6900/webdriver-support-in-safari-10/
Step 5: Configure Eclipse with Selenium WebDriver for a Java Project
Create a New Eclipse Java Project, Package, and Class
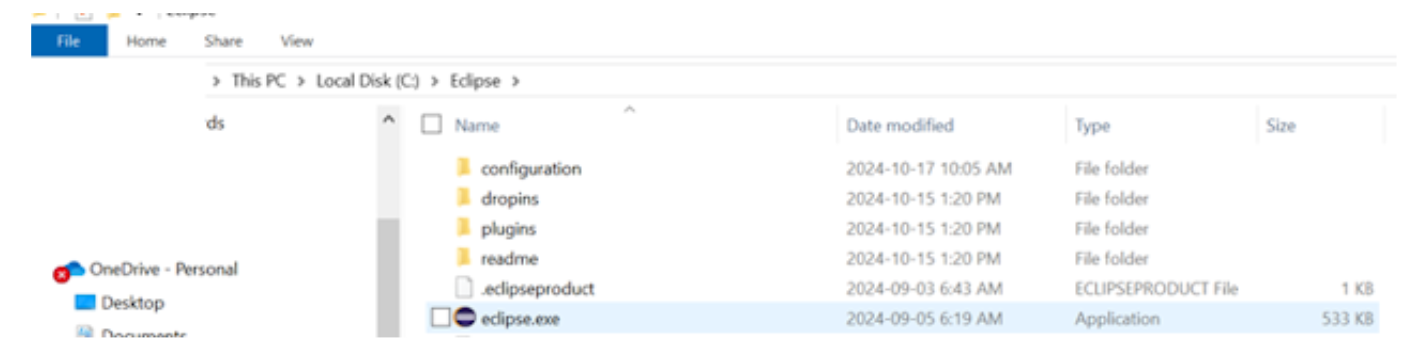
Launch the eclipse.exe file inside the Eclipse folder located on C:\eclipse\eclipse.exe.
If asked to select a workspace, keep the default workspace location and select OK.
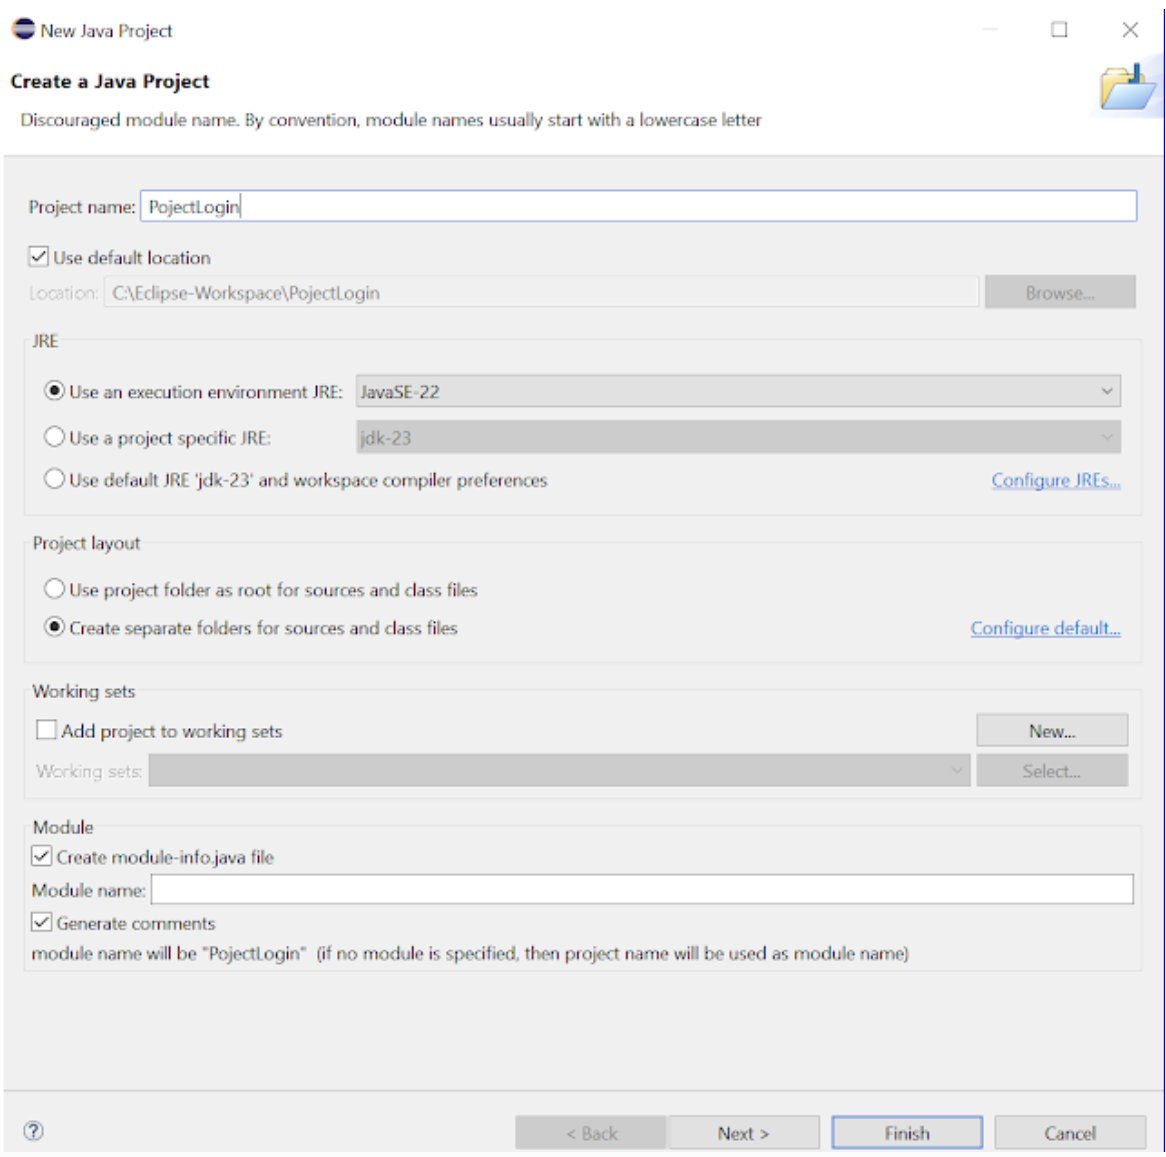
Launch Eclipse, then select File -> New -> Java Project.
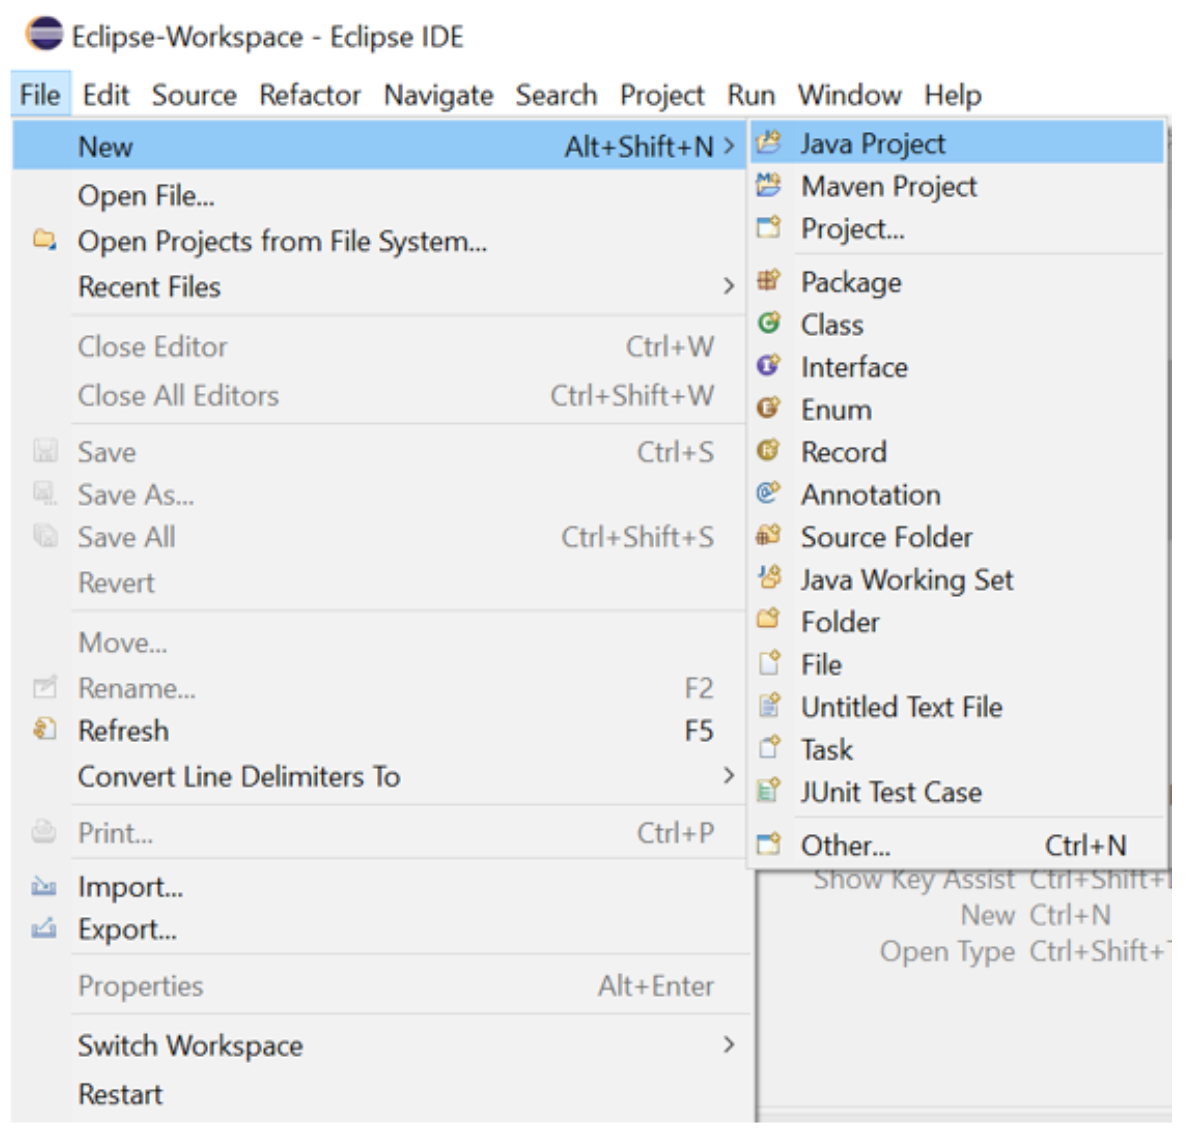
The following new pop-up window will open. Enter the Project name (Example: ProjectLogin). Keep the default values for all other fields and click the Finish button.
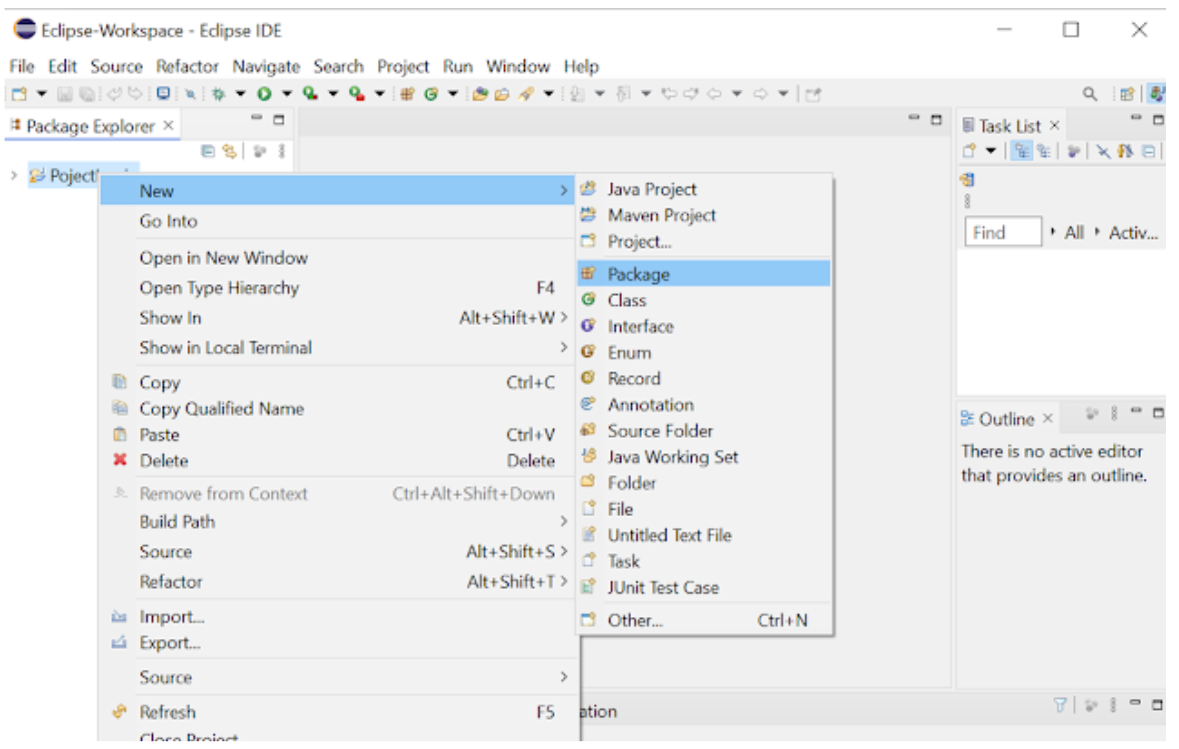
Add a new Package to your project:
Right-click on your newly created project name (Example: ProjectLogin) and select New > Package
A new window called Java Package will appear.
- Enter the name of your package in the Name field (Example: PackageLogin)
- Click on the Finish button

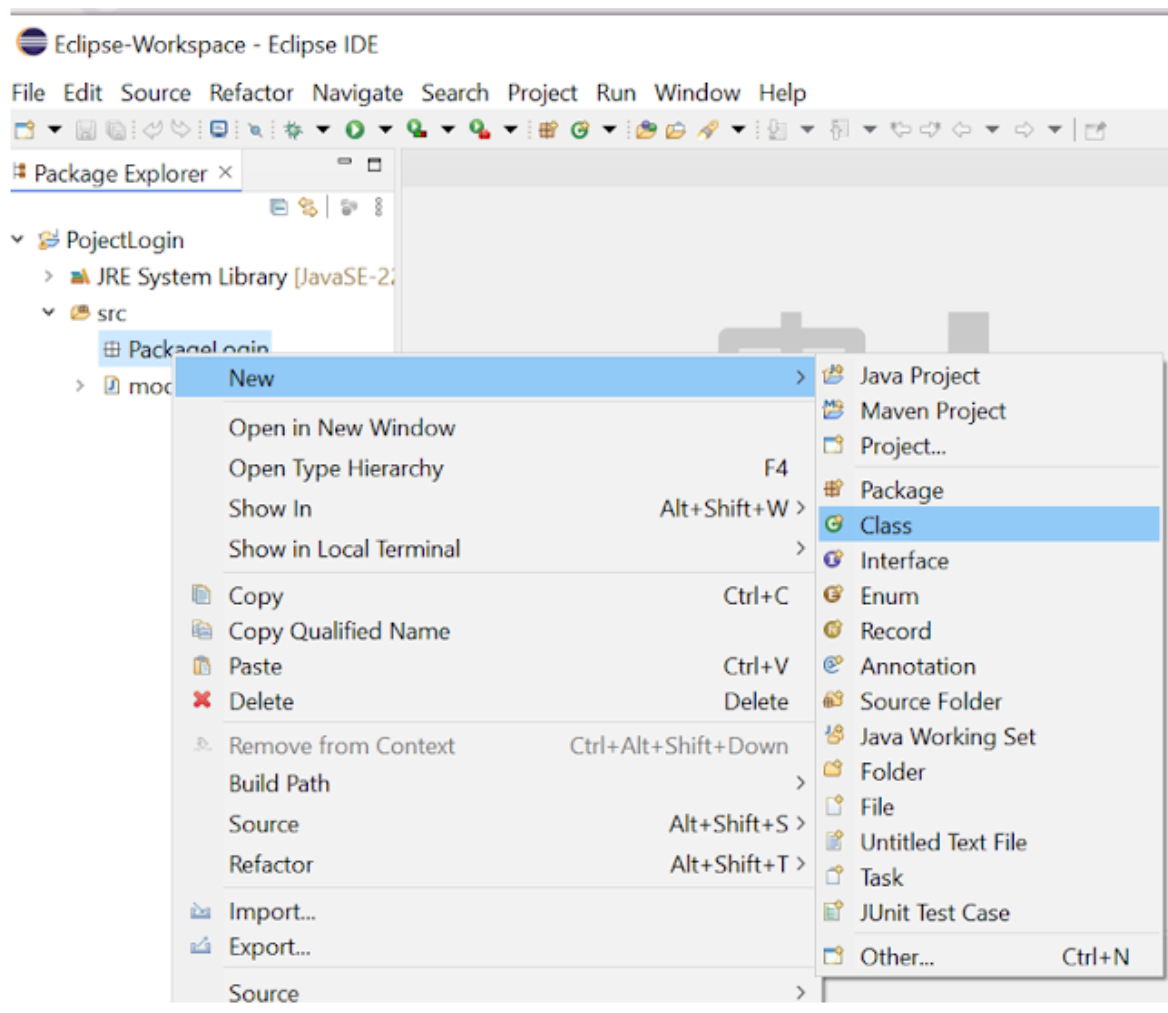
Create a new Java class under PackageLogin.
- Right click on PackageLogin
- Then select New > Class
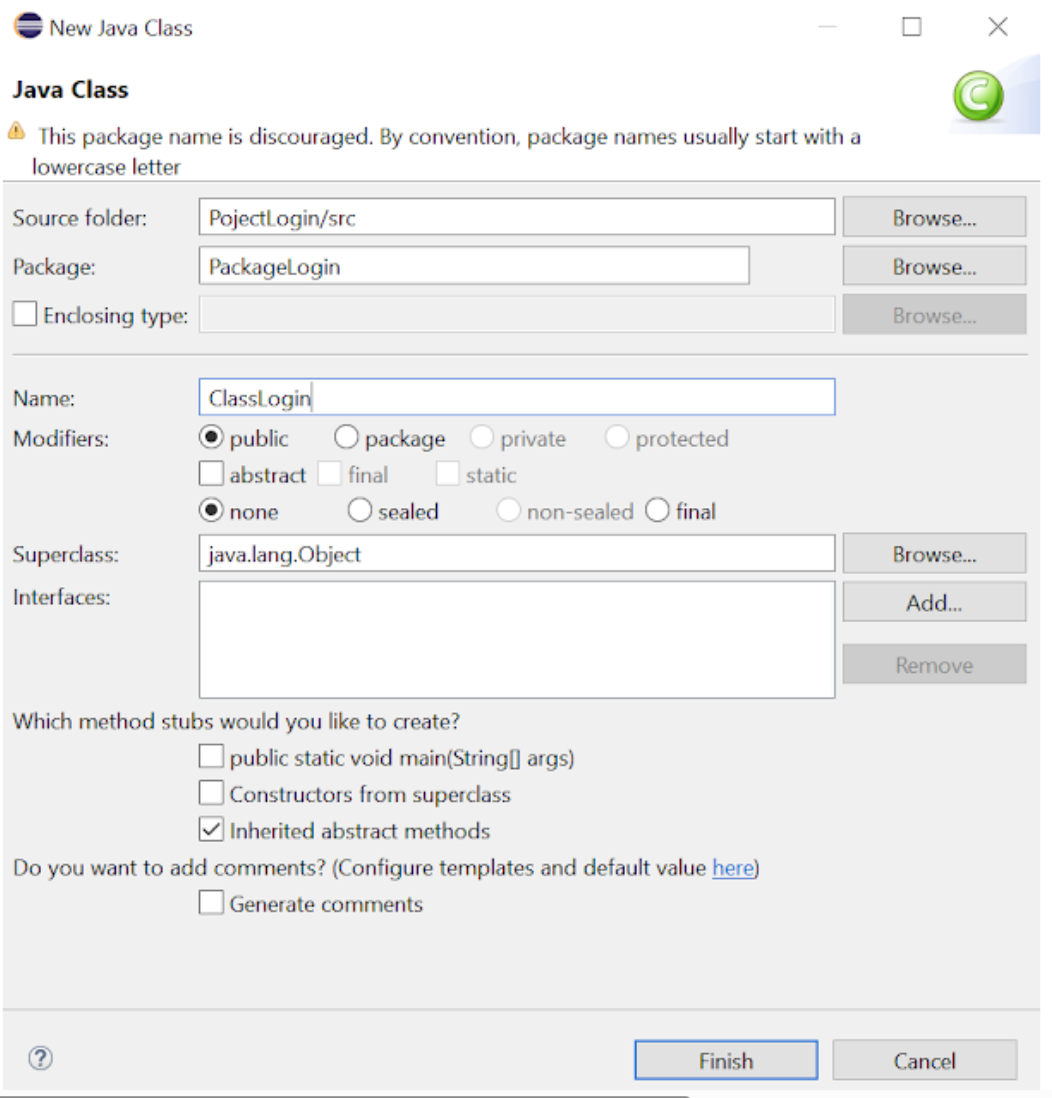
A new window will open called Java Class
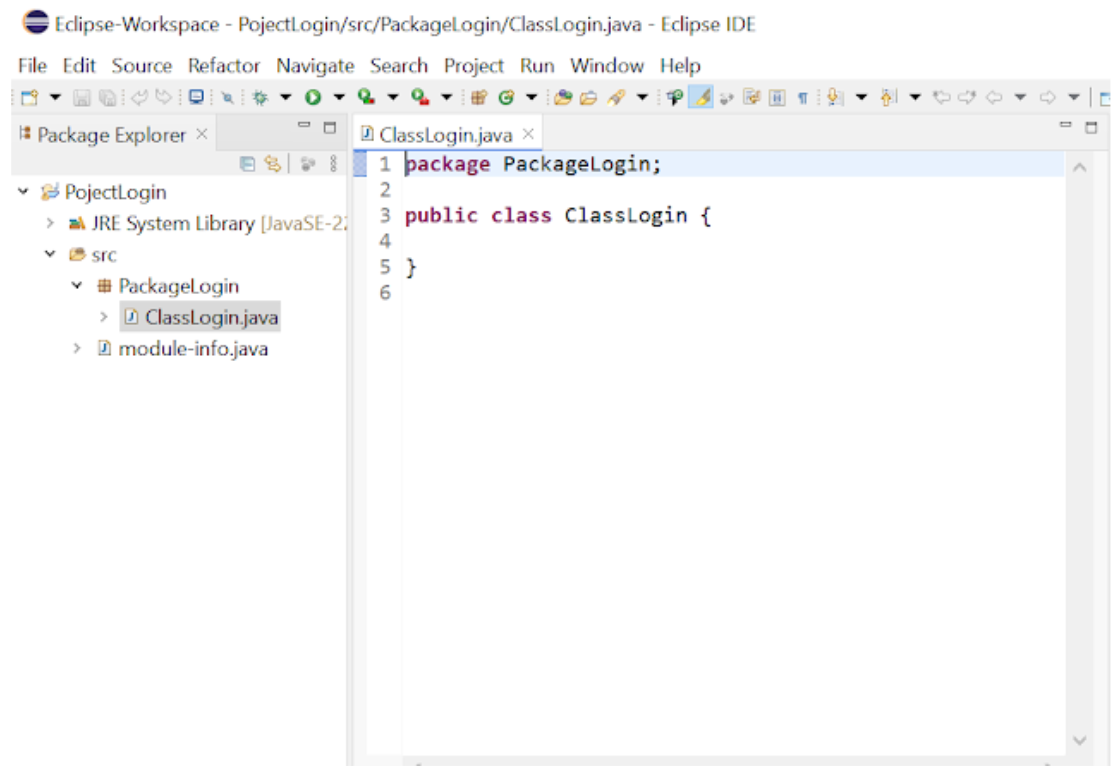
- Enter the name of your class in the Name field (Example: ClassLogin)
- Click the Finish button
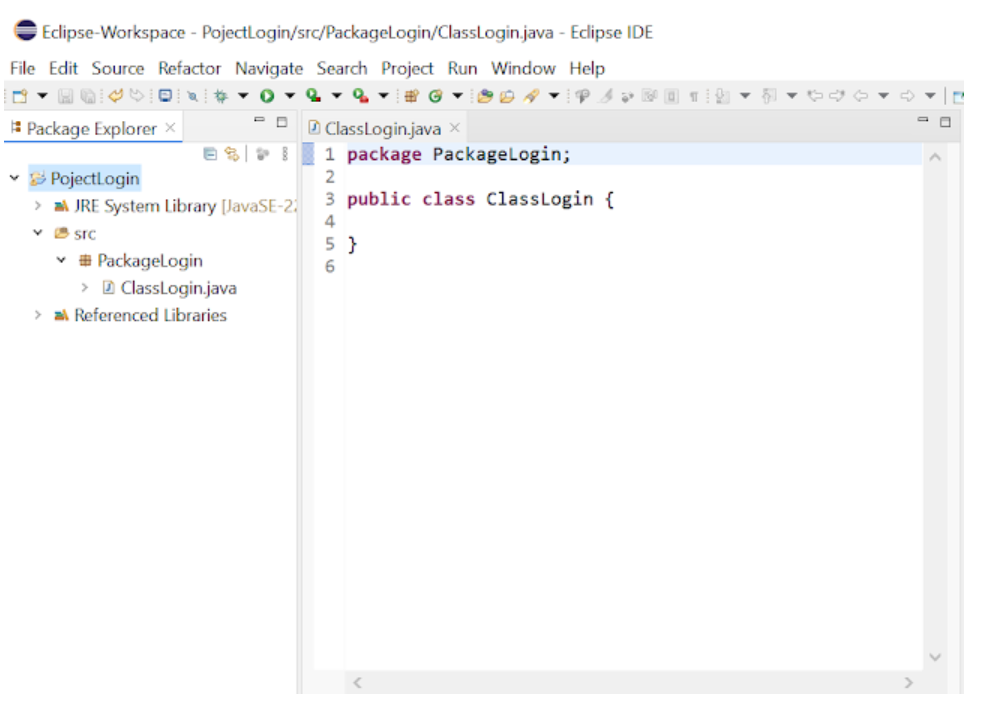
The Eclipse Package Explorer will now look like this:
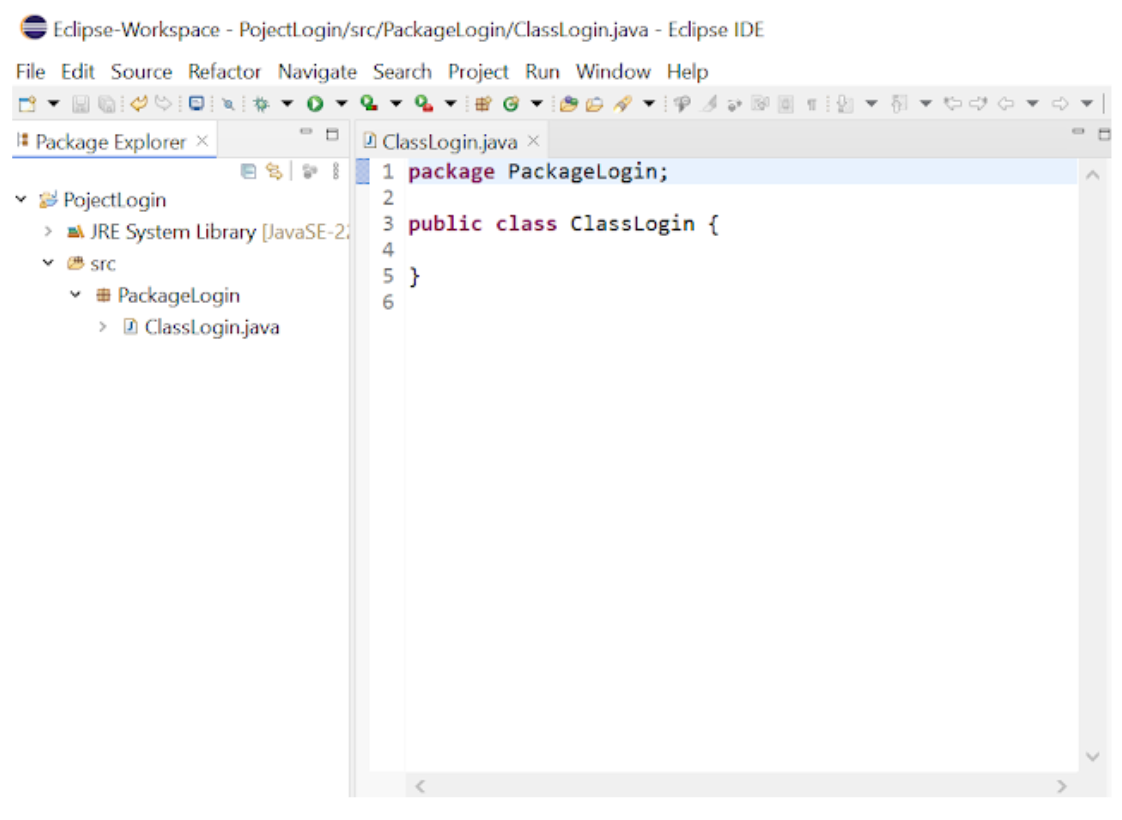
Now, delete the module-info.java file and any other file under the srs node that may have been created at the time of creating your Java project. These files can cause an error when importing certain selenium modules.
Your Eclipse Package Explorer should now look like this:
Configure Selenium WebDriver Libraries
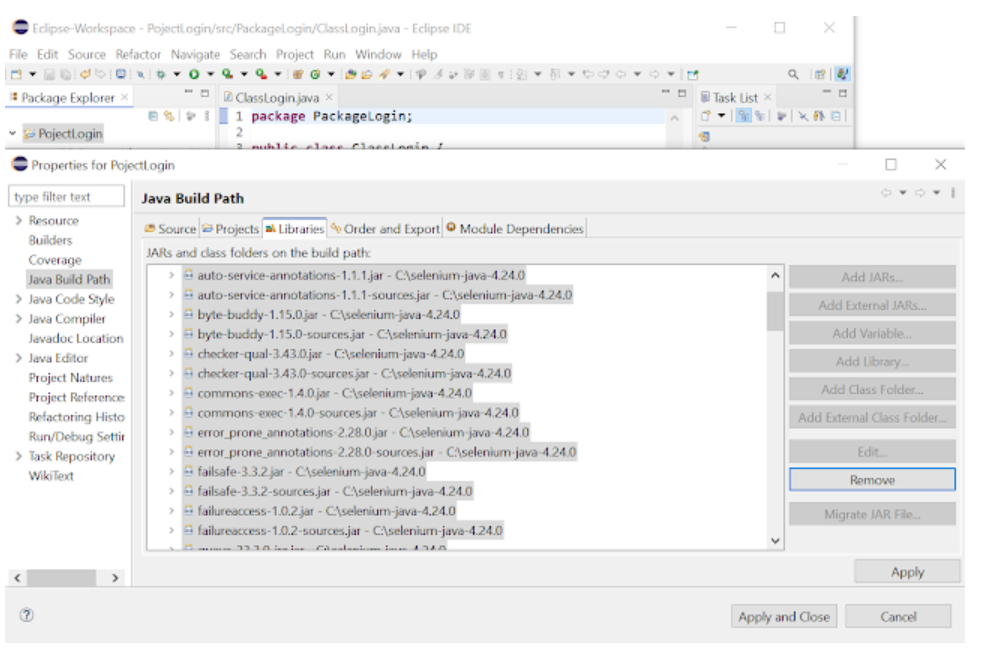
Right-click on your newly created project (Example: ProjectLogin) and select Properties.
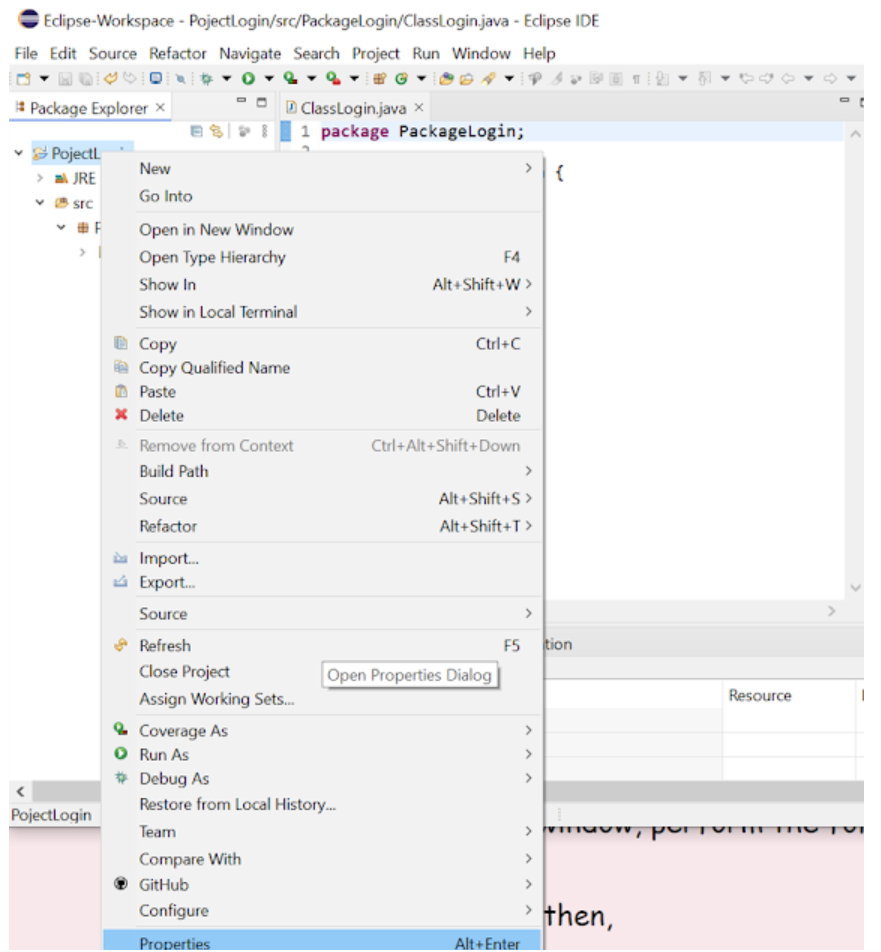
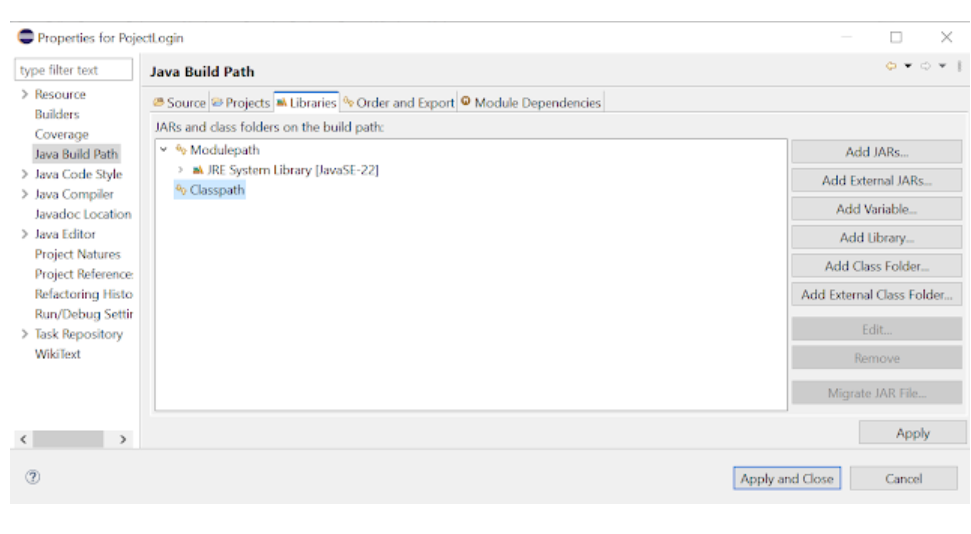
On the project Properties window, perform the following actions:
- click on Java Build Path, then,
- click on the Libraries tab,
- and click on Classpath,
- and click on Add External JARs…
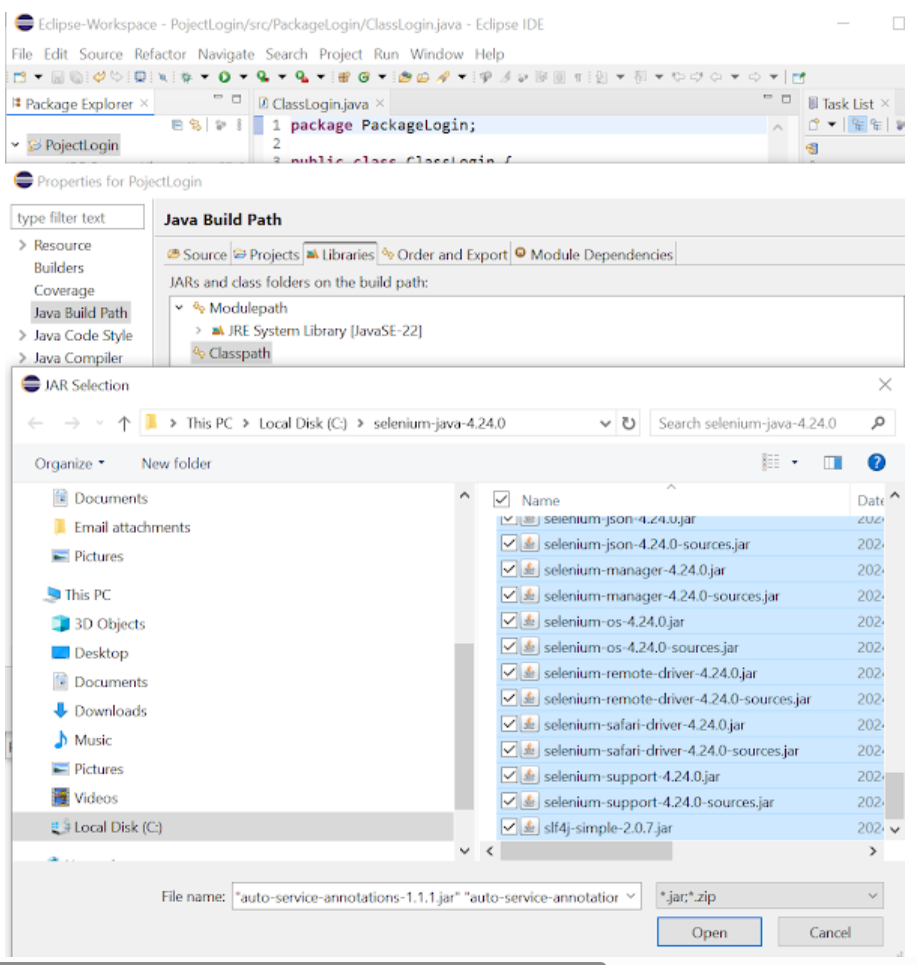
When you click on Add External JARs.., the Jar Selection window will appear. Now perform the following:
- Browse to select your selenium-java-
folder under the C: drive. - Select all of the jar files in the selenium-java-
folder, including the logback-classic-1.2.9.jar and the slf4j-simple/2.0.7.jar files that you added in Step 3. - Click the Open button
On the Java Build Path window, click the Apply and Close button.
The Referenced Libraries folder should appear under your Project in the Package Explorer:
Verify that Selenium Webdriver is configured correctly.
Click on your Project (Example: ProjectLogin)->Reference Libraries. All of the jar files from your selenium-java-
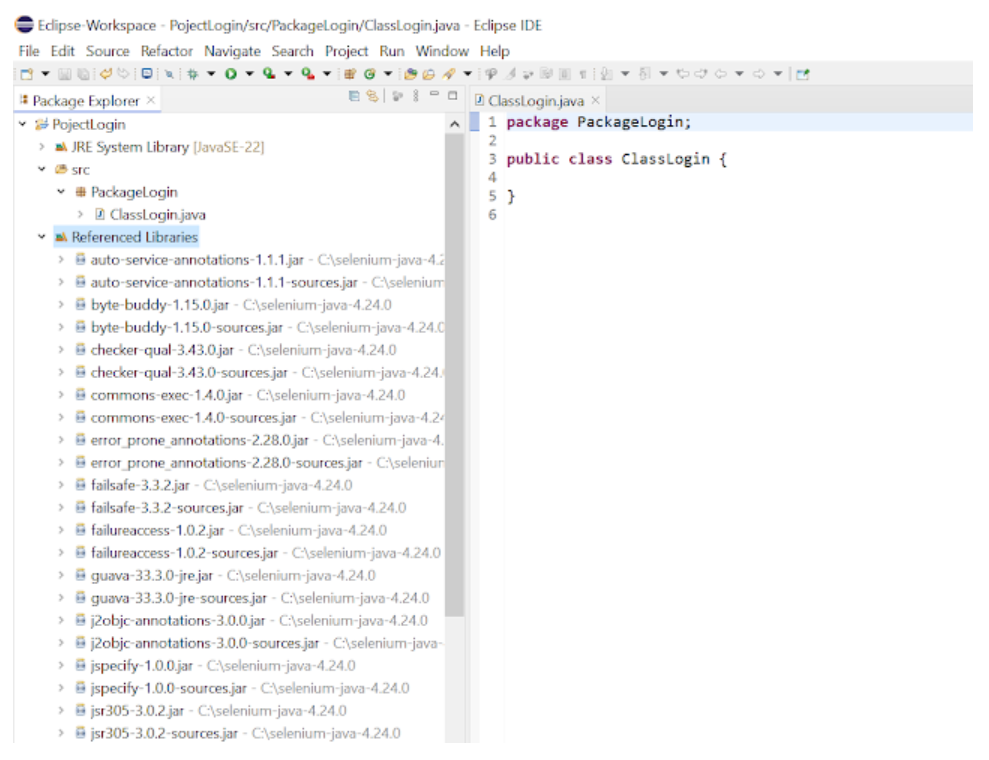
Congratulations! You’ve successfully installed and configured Selenium WebDriver and Eclipse for your first Java project.
Here is a link to the Selenium website where you can find instructions on how to write your first Selenium script in Java.
Conclusion
In conclusion, setting up Selenium for Eclipse with Java is a straightforward process that opens the door to powerful web automation and testing capabilities. By following the steps outlined in this guide, you can seamlessly integrate Selenium WebDriver with your Eclipse IDE, enabling you to write and execute automated test scripts with ease. As you become familiar with the setup process and begin creating your first test cases, you’ll quickly appreciate the efficiency and reliability Selenium brings to web testing.
With this solid foundation, you are well-equipped to explore more advanced features and techniques, driving your testing efforts towards more robust and reliable software applications.


🗨️ Reader Comments